Many laptops with NVIDIA graphics have the ability to switch between two graphics cards: the slower but more energy efficient Intel graphics on the CPU and the faster but more energy demanding NVIDIA graphics.
By default, the NVIDIA driver will be configured so that Leapfrog uses the slower Intel graphics. This can result in a significant loss of performance in our applications. This document explains how to configure the NVIDIA graphics driver so that Leapfrog can use the faster NVIDIA graphics.
Step 1 – update graphics drivers
The driver versions that are shipped with new laptops are usually very (sometimes more than a year) out of date. These drivers have some serious bugs that can adversely affect the performance and stability of Leapfrog. We recommend that users download and install the latest version of the graphics drivers that are available from the laptop manufacturer.
Step 2 – Install and run Leapfrog
Unfortunately there is no way to configure the NVIDIA driver correctly before the user has installed leapfrog. Also, if the user installs a new version of leapfrog, the NVIDIA driver will not be correctly configured for this new version. So if a user upgrades their version of leapfrog they will have to complete the steps in the document so that the new version uses the correct graphics card.
Now if the user checks the information in the System info tab in help->about, two graphics cards, “Video card 1” and “Video card 2” will be listed as shown in the screenshot below. In this example you can see that both the NVIDIA graphics card and the Intel graphics card are shown.
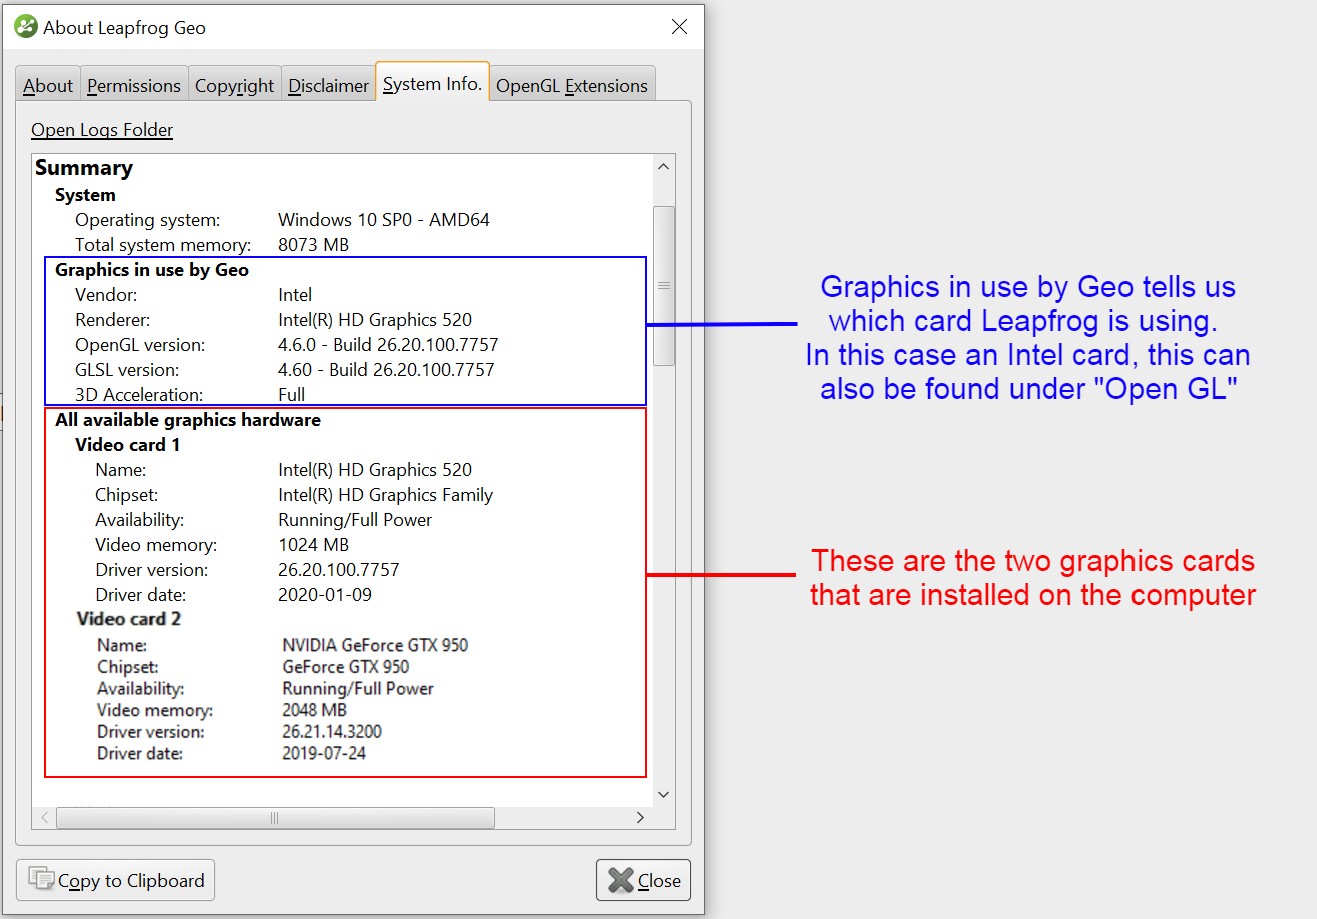
The graphics card that leapfrog is using is displayed under "Graphics in use by Geo" or alternatively, under the “OpenGL” section, in this case it is the Intel card. This shows us that the NVIDIA driver has not yet been correctly configured. We will look at the system info later on to see that NVIDIA graphics card is being used.
Step 3 – Configure the NVIDIA Switchable graphics
NOTE: All Leapfrog applications should be closed before proceeding with this step.
Now that we have run Leapfrog, we can configure the NVIDIA graphics driver in a way that will allow Leapfrog to use the NVIDIA graphics card.
Right click on the desktop and a menu will appear as shown in the screen shot below. Click on “NVIDIA Control Panel”.

This will open the “NVIDIA Control Panel” as shown below. To change what graphics card Leapfrog will use:
- Open manage 3d settings
- Click on the Program Settings tab.
- Click on the Add button.
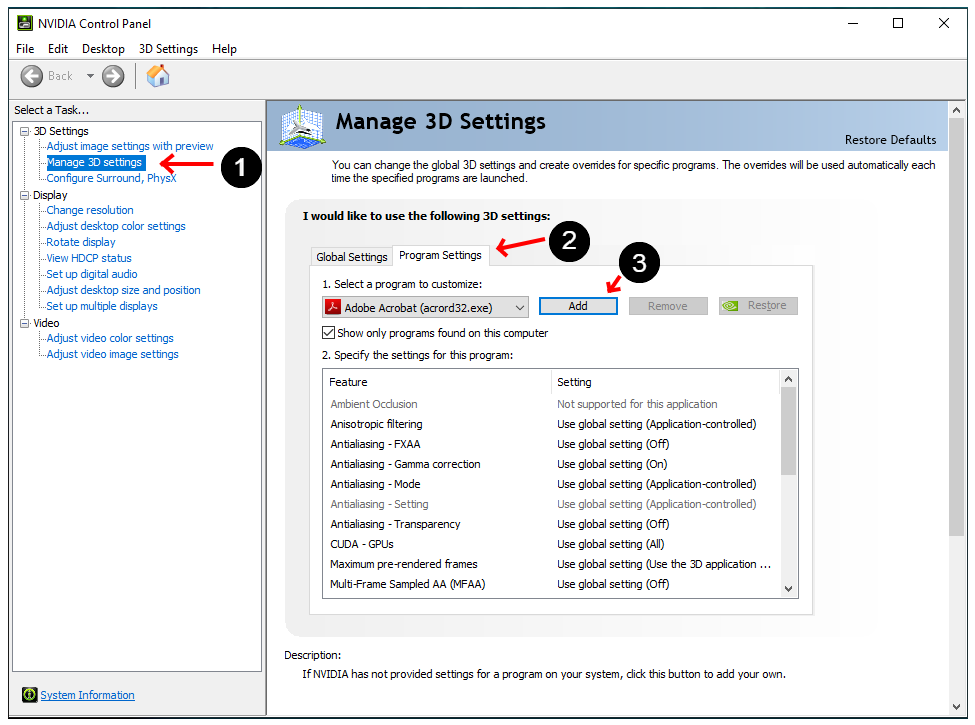
This will open a new window which will contain a list of programs:
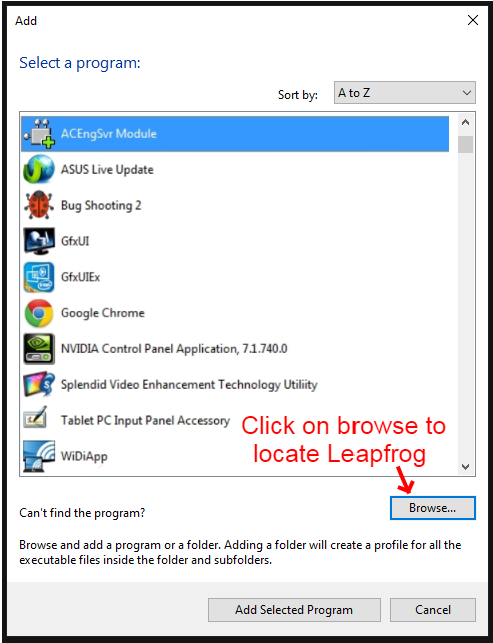
Unfortunately, the Leapfrog application you have installed may not appear on the list. If it is not on the list, you will need to click on the browse button to locate the leapfrog application you have installed. This will open a file browser. Navigate to where you have installed Leapfrog: in this case C:\Program Files\Seequent\Leapfrog Geo 5.1\bin select the application (Geo in this case) and click on open.
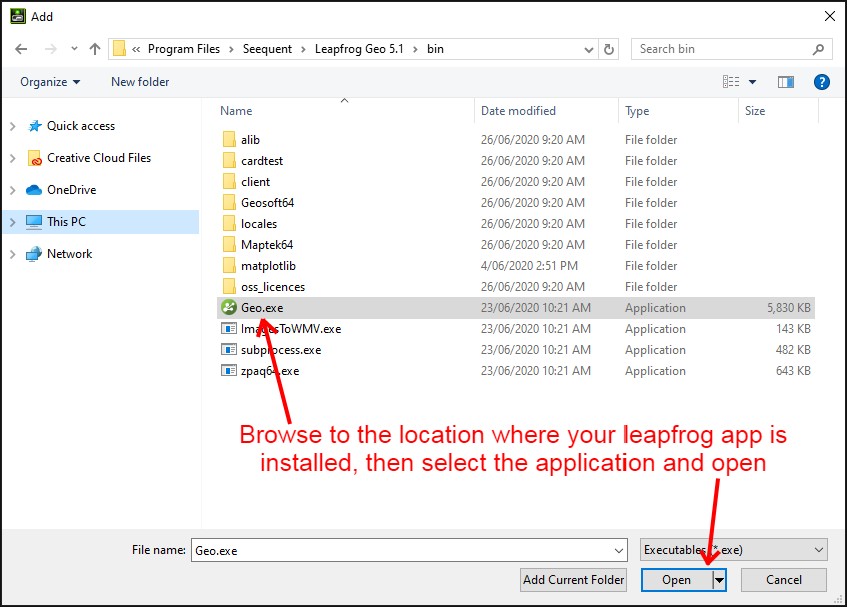
Figure 5 - In this file browser locate and select the Leapfrog application.
Clicking on open will close the browser window and will return to the NVIDIA control panel. Now we can tell the NVIDIA driver to allow Leapfrog to use the faster NVIDIA graphics.
- Below the text: “2. Select the preferred graphics processor for this program”, there is a large button. Click on this.
- A dropdown list will appear. Choose “High-performance NVIDIA processor” from the choices in the list.
- Click on the Apply button at the bottom of the control panel to apply then changes then close the NVIDIA Control panel.
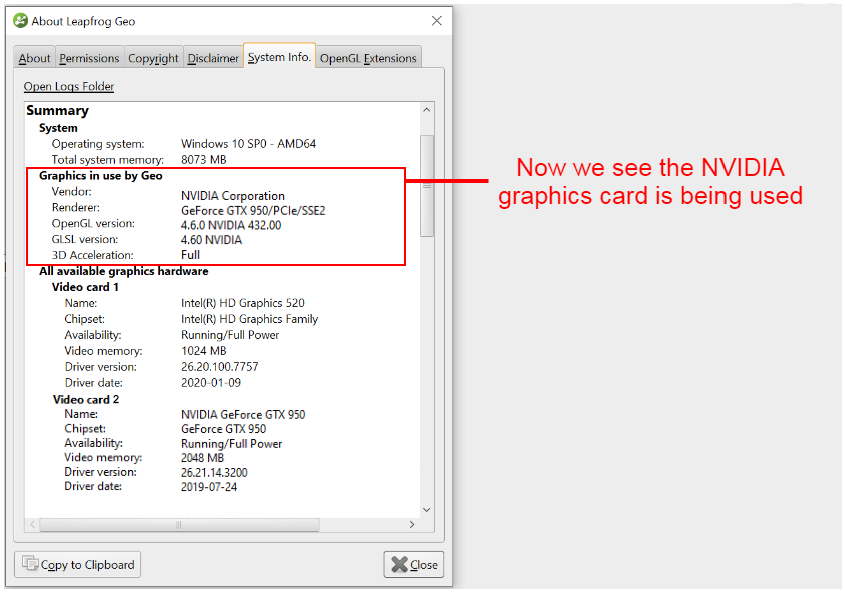
Step 4 – Start Leapfrog again and check which graphics card is used
Now after having made these changes, we should check that they have worked. This is easy, start leapfrog again and open help->about. Open the “System Info” tab again and look at the “OpenGL” section. Now you should see that the NVIDIA graphics card is being used.